Source Connector for MS SQL Server
This guide describes how to configure digna to connect to Microsoft SQL Server over ODBC, using a DSN-less connection string.
The digna side of the setup is the same for every technology — where connections are created, how property values are encrypted, how a connection is tested and what the profiling modes mean. It is described in Database Connections Overview. This page covers what is specific to SQL Server.
Azure Synapse Analytics
Synapse is configured as a SQL Server connection as well, with a different host name and a few extra considerations — see Azure Synapse.
1. Install the ODBC Driver
Install ODBC Driver 18 for SQL Server on the machine that runs the digna backend, following Microsoft's installation guide.
The driver that ships with Windows under the plain name SQL Server also works, but it is long superseded and supports neither modern TLS settings nor Azure authentication. Use it only where installing the current driver is not an option.
Read the exact registered driver name off your host as described in Install the ODBC Driver on the digna Host.
2. ODBC Properties
An example, not a specification
The set below is one combination that is known to work. The properties belong to the Microsoft ODBC driver, so their names, defaults and accepted values differ between driver versions — Driver 18 encrypts by default where Driver 17 did not, for one — and between platforms. Use this as a starting point and check the documentation of the driver version you installed.
Add the following properties in the Add DB Connection screen:
| Key | Example value | Notes |
|---|---|---|
DRIVER | ODBC Driver 18 for SQL Server | Must match the driver name registered on the digna host |
SERVER | sql.example.com | Server name or IP address. Named instances: host\instance; a non-default port: host,1433 |
PORT | 1433 | Omit when the port is already part of SERVER |
DATABASE | digna_source_db | Database that holds the source schemas. It is the only database this connection can profile |
UID | digna_source_user | Database user |
PWD | <password> | Tick Encrypted |
The resulting connection string looks like this:
DRIVER=ODBC Driver 18 for SQL Server;SERVER=sql.example.com;PORT=1433;DATABASE=digna_source_db;UID=digna_source_user;PWD=<password>
Encryption with ODBC Driver 18
Driver 18 encrypts connections by default and validates the server certificate. Against a server with a certificate that your digna host does not trust — a self-signed certificate, typically — the connect fails with a certificate-chain error. Add:
| Key | Example value | Notes |
|---|---|---|
Encrypt | yes | Default in Driver 18; set to no only if the server cannot do TLS |
TrustServerCertificate | yes | Skips certificate validation. Convenient in test environments; prefer installing the certificate in production |
Windows Authentication
To connect as the account that runs the digna service instead of with a SQL login, drop UID and PWD and add:
| Key | Example value | Notes |
|---|---|---|
Trusted_Connection | yes | The digna service account needs the database rights |
3. digna Configuration
In the Add DB Connection screen, provide the following:
Name:               Name of the connection. This is used for referencing the connection in other screens.
Technology:         SQL Server
Profiling Mode:     Standard, Permanent or Session
Work Schema:        Schema for the work tables of "Permanent" profiling, e.g. "digna_work"
4. Notes on MS SQL Server
- One connection sees one database. digna offers the schemas of the database named in
DATABASE, because SQL Server reports only the current database as a catalog. Source tables in another database need their own connection. - Profiling modes. Permanent creates the work tables in Work Schema, so the user needs
CREATE TABLEthere. Session uses local temporary tables (#wt_…) intempdband does not touch Work Schema. Standard needs read access only. SERVERcarries the instance and port. With a named instance,host\instanceneeds the SQL Server Browser service to be reachable;host,portavoids that.
5. Verifying the Driver (optional)
Configuring an ODBC data source is not required for a DSN-less connection, but the driver's own wizard is a convenient way to confirm that the driver works and that the server accepts your credentials before you enter them in digna.
Step 1
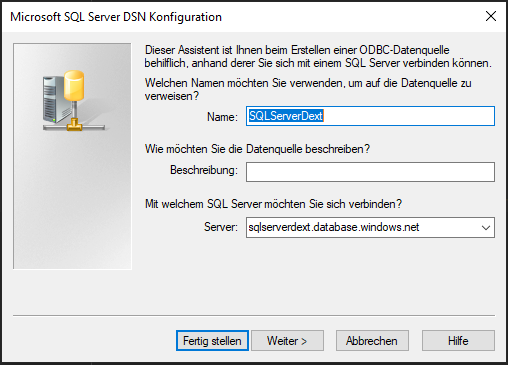
Click the Next > button.
Step 2
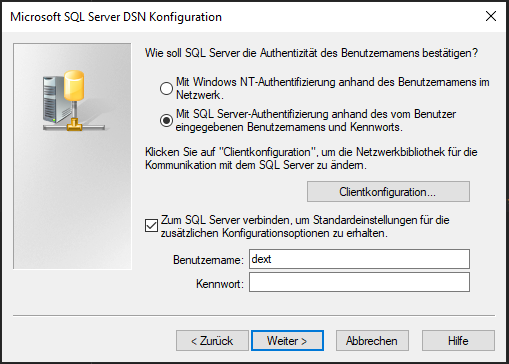
Choose the authentication method (e.g. username and password) and provide the required data.
Click the Next > button.
Step 3
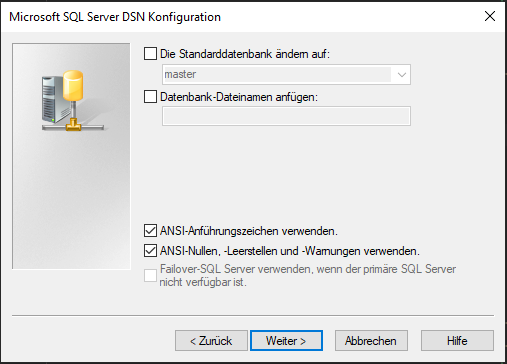
Choose the ANSI compliant settings then click the Next > button.
Step 4
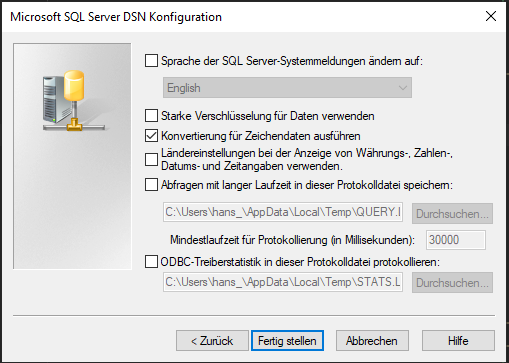
You can leave the default settings or choose logging options as needed and click the Finish button.
Step 5
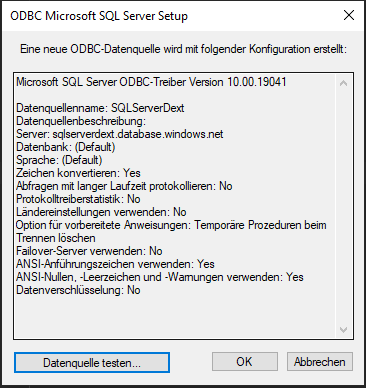
Now click the Test datasource button.
Step 6
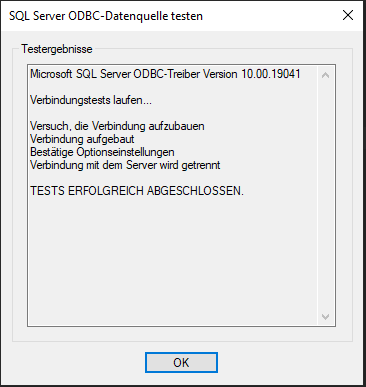
A success screen confirms that the driver and the credentials work. The values you entered are exactly the values the properties in section 2 take.