Source Connector for Snowflake
This guide describes how to configure digna to connect to Snowflake over ODBC, using a DSN-less connection string.
The digna side of the setup is the same for every technology — where connections are created, how property values are encrypted, how a connection is tested and what the profiling modes mean. It is described in Database Connections Overview. This page covers what is specific to Snowflake.
1. Install the ODBC Driver
Install the Snowflake ODBC Driver on the machine that runs the digna backend, following Snowflake's installation guide.
The driver registers itself as SnowflakeDSIIDriver. Read the exact registered name off your host as described in Install the ODBC Driver on the digna Host.
2. ODBC Properties
Snowflake is reached with a programmatic access token (PAT) — the authentication path digna is verified against, and the one Snowflake requires for accounts on which password-only sign-in is blocked.
An example, not a specification
The set below is one combination that is known to work. The properties belong to the Snowflake ODBC driver, so their names, defaults and accepted values differ between driver versions and platforms, and which authentication options your account permits is decided by the account's security policy. Use this as a starting point and check the documentation of the driver version you installed.
| Key | Example value | Notes |
|---|---|---|
Driver | {SnowflakeDSIIDriver} | Must match the driver name registered on the digna host |
Server | <account>.snowflakecomputing.com | Account identifier plus the suffix, e.g. rx42698.switzerland-north.azure.snowflakecomputing.com |
UID | digna | Snowflake user the token belongs to |
Database | TEST | Database that holds the source schemas. It is the only database this connection can profile |
Schema | PUBLIC | Default schema of the session |
authenticator | PROGRAMMATIC_ACCESS_TOKEN | Selects token authentication |
token | <programmatic access token> | Tick Encrypted |
The resulting connection string looks like this:
Driver={SnowflakeDSIIDriver};Server=<account>.snowflakecomputing.com;UID=digna;Database=TEST;Schema=PUBLIC;authenticator=PROGRAMMATIC_ACCESS_TOKEN;token=<programmatic access token>
Warehouse and role
Queries need a warehouse. If the digna user has a default warehouse and a default role, the session picks them up and nothing has to be configured. Otherwise add:
| Key | Example value | Notes |
|---|---|---|
Warehouse | DIGNA_WH | Warehouse that runs the profiling queries |
Role | DIGNA_READER | Role whose grants the session uses |
Give digna its own warehouse
A separate, small, auto-suspending warehouse keeps profiling cost visible and prevents digna from competing with interactive users for compute.
Password authentication
Where the account still allows it, a password works in place of the token — drop authenticator and token and add:
| Key | Example value | Notes |
|---|---|---|
PWD | <password> | Tick Encrypted |
3. digna Configuration
In the Add DB Connection screen, provide the following:
Name:               Name of the connection. This is used for referencing the connection in other screens.
Technology:         Snowflake
Profiling Mode:     Standard, Permanent or Session
Work Schema:        Schema for the work tables of "Permanent" profiling, e.g. "PUBLIC"
4. Notes on Snowflake
- Tokens expire. A programmatic access token is issued with a lifetime, and profiling stops the day it lapses. Note the expiry date when you create it, and re-enter the new token in the
tokenproperty — encrypted values can be replaced but not read back. - One connection sees one database. digna offers the schemas of the database named in
Database, because Snowflake reports only the current database as a catalog. Source tables in another database need their own connection. - Identifiers are upper case unless they were created quoted. digna uses the names as Snowflake reports them.
- Profiling modes. Permanent creates the work tables in Work Schema, so the role needs
CREATE TABLEthere. Session usesCREATE TEMPORARY TABLEand does not touch Work Schema. Standard needs read access only — and no write grants at all.
5. Verifying the Driver (optional)
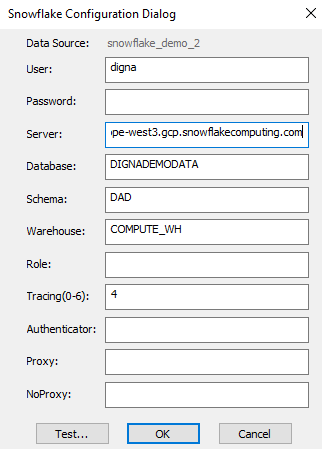
Configuring an ODBC data source is not required for a DSN-less connection, but the driver's own dialog is a convenient way to confirm that the driver, the account URL and your credentials work before you enter them in digna.
Step 1
Notes:
- The value for Server consists of your Snowflake account identifier followed by
.snowflakecomputing.com. - Database, Schema and Warehouse entered here correspond to the
Database,SchemaandWarehouseproperties in section 2.
Step 2 – Test the connection
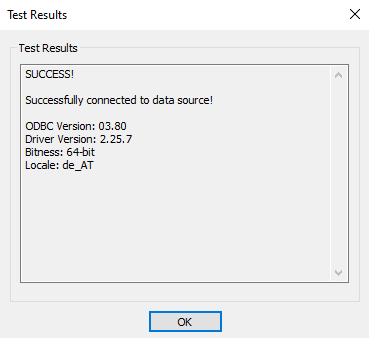
Click the TEST button. A successful connection should look like this: