Source Connector for Hive
This guide describes how to configure digna to connect to Apache Hive over ODBC, using a DSN-less connection string.
The digna side of the setup is the same for every technology — where connections are created, how property values are encrypted, how a connection is tested and what the profiling modes mean. It is described in Database Connections Overview. This page covers what is specific to Hive.
1. Install the ODBC Driver
Install the Cloudera ODBC Driver for Apache Hive on the machine that runs the digna backend, following the vendor's official installation guide.
Read the exact registered driver name off your host as described in Install the ODBC Driver on the digna Host.
2. ODBC Properties
An example, not a specification
The set below is one combination that is known to work. The properties belong to the Cloudera Hive driver, so their names, defaults and accepted values differ between driver versions and platforms, and what HiveServer2 accepts depends entirely on how the cluster is secured — authentication mechanism, transport mode, TLS, gateway. Use this as a starting point and check the documentation of the driver version you installed.
Add the following properties in the Add DB Connection screen:
| Key | Example value | Notes |
|---|---|---|
DRIVER | Cloudera ODBC Driver for Apache Hive | Must match the driver name registered on the digna host |
HOST | hive.example.com | HiveServer2 host name or IP address |
PORT | 10000 | HiveServer2 port; 10001 for HTTP transport |
The resulting connection string looks like this:
Authentication
An unsecured HiveServer2 accepts the three properties above as they are. Where authentication is enabled, add:
| Key | Example value | Notes |
|---|---|---|
AuthMech | 3 | 0 no authentication, 2 user name only, 3 user name and password, 1 Kerberos |
UID | digna_source_user | Required for AuthMech 2 and 3 |
PWD | <password> | Required for AuthMech 3. Tick Encrypted |
For Kerberos (AuthMech=1), the digna host additionally needs a valid ticket or keytab, plus the KrbHostFQDN, KrbServiceName and KrbRealm properties the driver documents.
Transport and TLS
| Key | Example value | Notes |
|---|---|---|
ThriftTransport | 2 | 0 binary (the default, port 10000), 1 SASL, 2 HTTP (port 10001, and what a Knox gateway expects) |
HTTPPath | cliservice | With ThriftTransport=2 |
SSL | 1 | Where HiveServer2 is TLS-secured |
Schema | dignadata | Hive database the session starts in. Optional — digna qualifies its queries |
3. digna Configuration
In the Add DB Connection screen, provide the following:
Name:               Name of the connection. This is used for referencing the connection in other screens.
Technology:         Hive
Profiling Mode:     Standard, Permanent or Session
Work Schema:        Hive database for the work tables of "Permanent" profiling, e.g. "digna_work"
4. Notes on Hive
- Catalogs come from the driver. Hive has no catalog of its own, so digna takes what the driver reports — normally a single entry named
HIVE— and lists the Hive databases as schemas below it. - Work Schema is a Hive database. For Permanent profiling, the user needs the right to create and drop tables in it, and the underlying storage location must be writable.
- Profiling modes. Permanent creates the work tables in Work Schema. Session uses
CREATE TEMPORARY TABLE, which needs a HiveServer2 that supports temporary tables and does not touch Work Schema. Standard needs read access only, and is the mode to choose on a cluster where digna has no write access at all. - Profiling is a set of queries, not a scan. Every statistic is computed by HiveServer2, so the queue digna's user submits to should have enough capacity for the inspection window.
5. Verifying the Driver (optional)
Configuring an ODBC data source is not required for a DSN-less connection, but the driver's own dialog is a convenient way to confirm that the driver, the transport mode and your credentials work before you enter them in digna.
Step 1
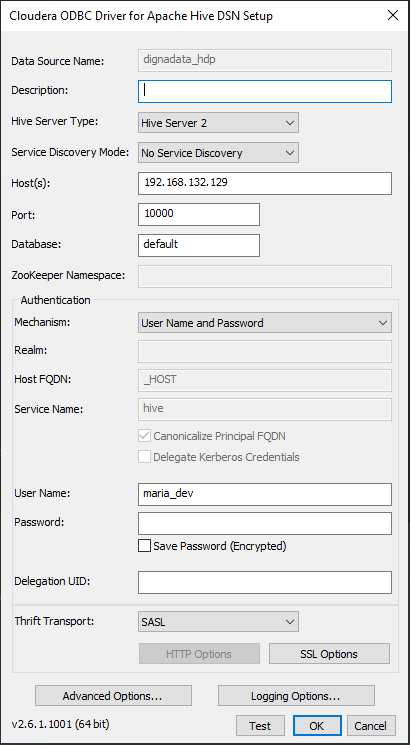
The Host, Port, Database, Mechanism and Thrift Transport fields here are the HOST, PORT, Schema, AuthMech and ThriftTransport properties in section 2.
Step 2 – Test the connection
Provide the password and click the Test button.
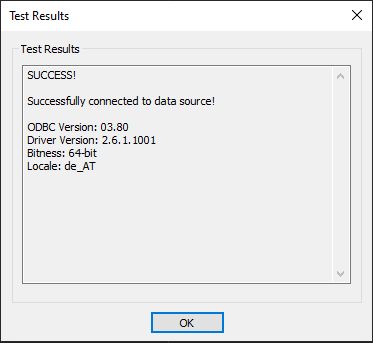
After a successful test, click the OK button.